

Panisse, the Delicious Cousin of the French Fry.
Marseille, the capital of Provance, is home to one of France’s most delicious snacks and one of its best kept culinary secrets: the panisse. Though panisse have been around for centuries, its fame has not spread the way many of France’s other gastronomical offerings have. Traditionally served as a street food panisse is a chickpea-based fritter best enjoyed hot, greasy, and generously seasoned, alongside a cold glass of rosé.
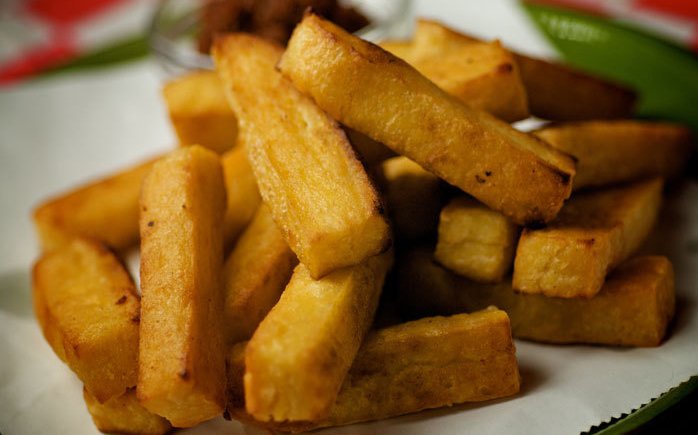
The panisse looks like a thick-cut french fry, crisp and golden on the outside. It is first cooked in a saucepan then fried. Appearance is where the similarities end. Panisse has an interior that is custardy, bringing to mind a fine-polenta over a starchy potato, and contrasting wonderfully with its crunchy exterior. Simple to make, the panisse is comprised of nothing more than chickpea flour and water, stirred into a paste, cooked, cooled, cut, then fried and seasoned to taste!
With such a seemingly simple recipe, there are a few things that can go wrong, here are our tips for making the perfect panisse.

Quality is Vital
Since the panisse relies solely on chickpea flour, the quality and grind of your flour is important. Make sure to buy very finely ground chickpeas instead of the course stuff to ensure a velvety interior. Another way to ensure a smooth panisse is to sift your flour before adding anything to it; or, after making your batter, run it through a food mill to remove any lumps.
A Little Fat Never Hurt
While technically you can make panisse with nothing more than flour and water, the addition of a little olive oil or butter helps round out the flavor and texture. This is a highly recommended addition.
Hot Hot Hot
Make sure your water is hot before adding in your flour, this ensures that the flour is cooked thoroughly. Cook until mixture is extremely thick as it won’t set up if it’s in anyway under-cooked.
Shaping Up
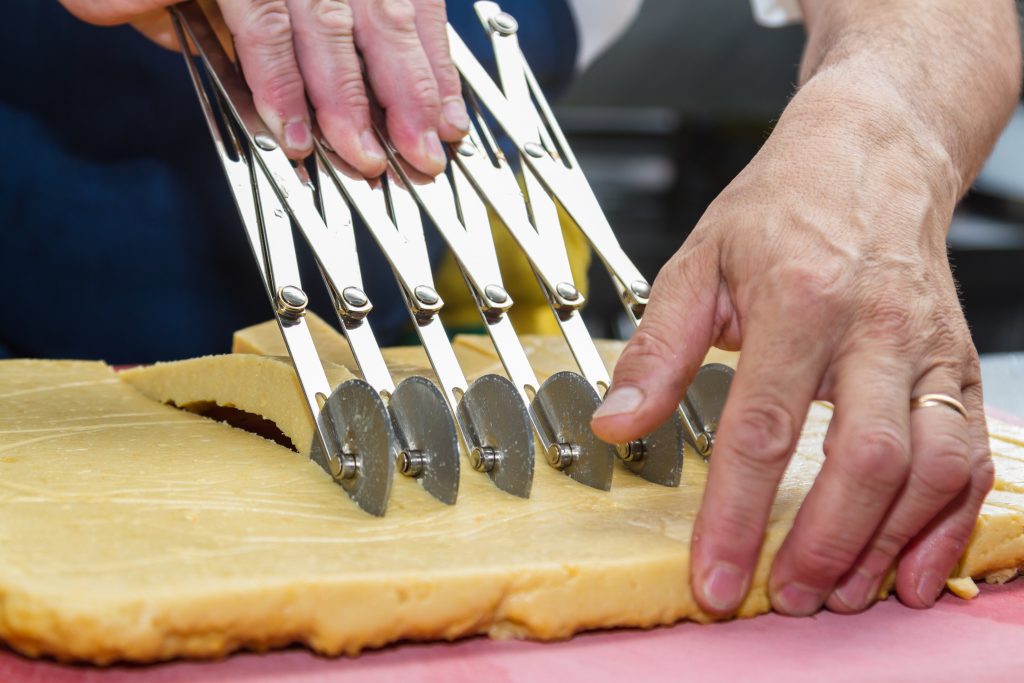
You can cut your panisse into any shape you desire. It is traditional in Marseille to cut them into thick strips. Just two hours away, in Nice you’ll find them in rounds made using coffee saucers as molds. Let your imagination run wild and feel free to cut them into any shape desired.

The Perfect Panisse
Ingredients – Serves 36
- 6 Tablespoons Extra Virgin Olive Oil
- 6 Tablespoons Butter, unsalted
- 4½ Teaspoons Kosher Salt
- 12 Cups Chickpea Flour
- Vegetable Oil (for frying)
- Sea Salt
- Black Pepper, freshly ground
Instructions
Line 6 rimmed baking sheets with plastic wrap and spray lightly with non-stick spray, set aside for later use.
In a large heavy-bottomed stock pot combine olive oil, butter, and salt. Add in 12 pints of water and bring to a simmer over high-heat. Once you’ve reached a brisk simmer add in the flour and lower the heat, being sure to maintain the simmer. Cook the mixture whisking constantly until it becomes quite thick and starts to bubble. The whisk should now be discarded for a sturdy wooden spoon. Continue to cook another 8-10 minutes.
Once you’re satisfied with the thickness of your panisse batter divide it onto the prepared baking sheets. Using an offset spatula, smooth the surface and wrap with plastic. Refrigerate for 3 hours and up to 24 until the panisse is firm and cuttable.
Once you’re ready to fry your panisse, unmold them onto a large cutting board and cut them into desired shapes. Once the panisse is all cut, remove the plastic wrap from your baking sheets and line each sheet with paper towels. Set them beside your stove top, stacking them in a criss-cross pattern.
In a large skillet add your vegetable oil and bring to a medium-high heat, until the surface of the oil begins to “shimmer” slightly. Begin adding your panisse in batches, being careful not to overcrowd the pan. Once golden on each side transfer the panisse onto your prepared baking sheets and allow to drain. Season each batch immediately after removing them from the skillet. Continue with the remaining panisse until all of them are cooked, adding more vegetable oil as needed.
1 Comment
Outstanding blog site! I am amazed with pointers of writer.
Write a Comment
Categories
Recent Posts
Popular Posts
Join thousands of other operators in receiving valuable weekly insights and cost-saving tips delivered straight to your inbox.
Subscribe to our blog!